Author: admin

  • 15 Common Ingredient Substitutions Every Home Cook Needs

    Home / Cooking Tips / Ingredient Substitutions
    Kitchen Cheatsheet

    15 Common Ingredient Substitutions Every Home Cook Needs

    Midway through cooking and realized you’re out of buttermilk, heavy cream, or cornstarch? Here are 15 dependable kitchen swaps that actually work.

    1. Buttermilk (1 cup)

    Swap: 1 cup whole milk + 1 tbsp fresh lemon juice or white vinegar. Let stand 5 minutes to curdle.

    2. Heavy Cream (1 cup, in sauces)

    Swap: 3/4 cup milk + 1/4 cup melted unsalted butter (whisked together). Note: will not whip into peaks.

    3. Cornstarch (1 tbsp, thickening)

    Swap: 2 tablespoons all-purpose flour OR 1 tablespoon arrowroot powder.

    4. Baking Powder (1 tsp)

    Swap: 1/4 tsp baking soda + 1/2 tsp cream of tartar.

    5. Fresh Herbs (1 tbsp)

    Swap: 1 teaspoon dried herbs (rule of 1:3 ratio, as dried herbs are more concentrated).

    6. Brown Sugar (1 cup)

    Swap: 1 cup granulated white sugar + 1 tablespoon molasses (mix with a fork).

    7. Dry White Wine (1/2 cup)

    Swap: 1/2 cup chicken or vegetable broth + 1 tablespoon fresh lemon juice or white wine vinegar.

    8. Sour Cream (1 cup)

    Swap: 1 cup plain whole-milk Greek yogurt (1:1 ratio).
  • The Essential Guide to Safe Meat Temperatures & Doneness Cues

    Home / Cooking Tips / Meat Temperatures Guide
    Kitchen Fundamentals

    The Essential Guide to Safe Meat Temperatures & Doneness Cues

    Never second-guess whether your roast, steak, or chicken is ready. Here is the definitive USDA temperature guide paired with real sensory benchmarks.

    Why Digital Thermometers Beat Guesswork

    Poking a chicken breast with your finger or cutting into a steak while it rests releases precious juices and produces inconsistent results. A simple, inexpensive instant-read digital food thermometer is the single most valuable tool in any home cook’s drawer.

    USDA Safe Temperature Reference Chart

    Meat Type Minimum Internal Temp Rest Time Visual / Sensory Cues
    Poultry (Chicken & Turkey) 165°F (74°C) 5 minutes Juices run clear; meat is opaque white throughout with no pink rubbery texture.
    Ground Meats (Beef, Pork) 160°F (71°C) None required Firm throughout, juices clear, no translucent red center.
    Beef Steaks & Roasts (Medium-Rare) 130°F – 135°F 5-10 minutes Warm red center, soft springy resistance to touch. Pull 5°F early for carryover!
    Beef Steaks & Roasts (Medium) 140°F – 145°F 5-10 minutes Warm pink center, slightly firmer pushback.
    Pork Chops & Roasts 145°F (63°C) 3 minutes Faint blush of pink is completely safe and guarantees juicy meat.
    Fish & Shellfish 145°F (63°C) None required Flesh separates easily into clean flakes; shrimp turns opaque pearly pink.

    The Rule of Carryover Cooking

    Large cuts of meat continue to rise 5°F to 10°F in temperature after you remove them from heat. For steaks and roasts, always pull them from the oven or grill when they are 5°F below your target temperature, tent loosely with foil, and let resting work its magic.

  • Iced Vanilla Cold Brew with Sweet Cream

    Iced Vanilla Cold Brew with Sweet Cream

    Home / Recipes / Iced Vanilla Cold Brew with Sweet Cream

    Iced Vanilla Cold Brew with Sweet Cream

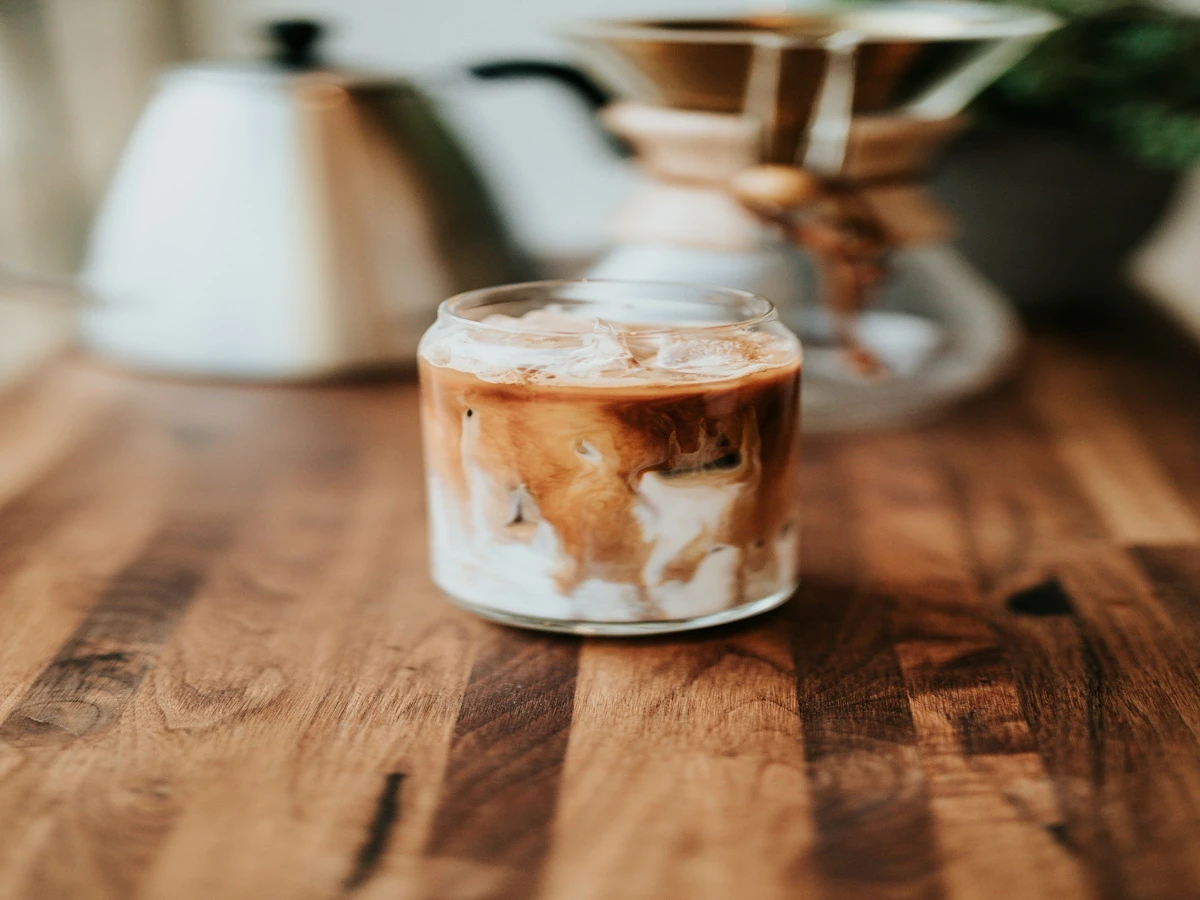
    Smooth, bold homemade cold brew coffee over ice, topped with a cascading layer of velvety vanilla sweet cream that rivals your favorite coffee shop.

    CP
    CookeryPulse Kitchen Tested & Verified • Oct 13, 2026
    Iced Vanilla Cold Brew with Sweet Cream

    Why This Recipe Works

    • Cold Extraction: Slow steeping produces coffee with 60% less acidity than traditional hot-brewed coffee.
    • Frother Aeration: A 15-second whip of the cream creates that signature floating cloud that slowly cascades into the dark coffee.
    • Pure Vanilla: Quality vanilla extract brings warmth and natural aroma without artificial aftertastes.

    Iced Vanilla Cold Brew with Sweet Cream

    Smooth, bold homemade cold brew coffee over ice, topped with a cascading layer of velvety vanilla sweet cream that rivals your favorite coffee shop.

    Prep Time
    5 mins
    Cook Time
    0 mins
    Total Time
    5 mins
    Servings
    2
    Scale Ingredients:

    Ingredients (US Customary)

    • 2 cups bold cold brew coffee concentrate or prepared cold brew
    • 2 cups ice cubes
    • 0.25 cup heavy cream
    • 2 tablespoons whole milk
    • 1.5 tablespoons pure vanilla syrup or maple syrup
    • 0.5 teaspoon pure vanilla extract

    Step-by-Step Instructions

    • 1
      Prepare the Cold Brew

      Fill two tall glasses with ice cubes. Pour 1 cup of cold brew coffee into each glass, leaving about 2 inches of space at the top.

    • 2
      Whip the Sweet Cream

      In a small measuring cup or glass, combine the heavy cream, whole milk, vanilla syrup, and vanilla extract. Use a handheld milk frother for 15 to 20 seconds until lightly frothed and slightly thickened (it should remain pourable, like melted ice cream).

    • 3
      Pour and Cascade

      Slowly pour the sweet cream over the top of the iced coffee. Watch the velvety cream cascade down through the dark coffee. Stir gently with a straw and enjoy!

    Kitchen Notes & Chef Tips

    Dairy-Free Option: Swap oat milk and full-fat canned coconut milk for an equally luxurious vegan sweet cream.

    Sweetness Control: Adjust the vanilla syrup to your personal taste.

    140 kcal
    Calories
    1 g
    Protein
    16 g
    Carbs
    8 g
    Fat
  • Easy Sheet-Pan Chicken Fajitas with Bell Peppers

    Easy Sheet-Pan Chicken Fajitas with Bell Peppers

    Home / Recipes / Easy Sheet-Pan Chicken Fajitas with Bell Peppers

    Easy Sheet-Pan Chicken Fajitas with Bell Peppers

    Slices of tender seasoned chicken breast roasted alongside sweet bell peppers and red onions on a single sheet pan, finished with fresh lime and warm tortillas.

    CP
    CookeryPulse Kitchen Tested & Verified • Oct 13, 2026
    Easy Sheet-Pan Chicken Fajitas with Bell Peppers

    Why This Recipe Works

    • High-Heat Roasting: Blasting at 425°F develops delicious charred edges on the peppers and chicken strips in 20 minutes.
    • Uniform Slicing: Slicing chicken and peppers into matching 1/2-inch strips ensures even cooking across the entire baking sheet.
    • Single-Pan Ease: Complete dinner ready with virtually zero sink cleanup.

    Easy Sheet-Pan Chicken Fajitas with Bell Peppers

    Slices of tender seasoned chicken breast roasted alongside sweet bell peppers and red onions on a single sheet pan, finished with fresh lime and warm tortillas.

    Prep Time
    15 mins
    Cook Time
    20 mins
    Total Time
    35 mins
    Servings
    4
    Scale Ingredients:

    Ingredients (US Customary)

    • 1.5 pounds boneless, skinless chicken breasts, sliced into 1/2-inch strips
    • 3 bell peppers (red, yellow, green), seeded and sliced into thin strips
    • 1 large red onion, sliced into strips
    • 3 tablespoons olive oil
    • 1 tablespoon chili powder
    • 1.5 teaspoons ground cumin
    • 1 teaspoon garlic powder
    • 1 teaspoon onion powder
    • 1 teaspoon smoked paprika
    • 1 teaspoon kosher salt
    • 1 lime, juiced, plus wedges for serving

    Step-by-Step Instructions

    • 1
      Preheat Oven & Prep

      Preheat your oven to 425°F (220°C). Line a large rimmed baking sheet with aluminum foil or parchment paper and mist lightly with cooking spray.

    • 2
      Season the Mix

      Place sliced chicken, bell peppers, and red onion directly on the baking sheet. Drizzle with olive oil. In a small bowl, combine chili powder, cumin, garlic powder, onion powder, smoked paprika, and salt. Sprinkle spice mix over the sheet and toss everything with tongs until thoroughly coated. Spread into an even, single layer.

    • 3
      Roast to Charred Perfection

      Roast for 18 to 22 minutes, tossing once halfway through, until the chicken reaches 165°F and the peppers are tender with blistered edges.

    • 4
      Finish & Serve

      Remove from oven and immediately squeeze fresh lime juice over the hot sheet pan. Serve with warm flour tortillas, guacamole, salsa, and sour cream.

    Kitchen Notes & Chef Tips

    Don’t Overcrowd: If your sheet pan is small, use two pans so the veggies roast rather than steam.

    Meal Prep Bowl: Portion leftovers over brown rice, black beans, and salsa for satisfying weekday burrito bowls.

    340 kcal
    Calories
    34 g
    Protein
    18 g
    Carbs
    14 g
    Fat
  • Warm Cinnamon Apple Crisp with Golden Oat Streusel

    Warm Cinnamon Apple Crisp with Golden Oat Streusel

    Home / Recipes / Warm Cinnamon Apple Crisp with Golden Oat Streusel

    Warm Cinnamon Apple Crisp with Golden Oat Streusel

    Tender spiced Honeycrisp and Granny Smith apples baked under a buttery, brown sugar and rolled oat crumble topping, served warm with vanilla bean ice cream.

    CP
    CookeryPulse Kitchen Tested & Verified • Oct 13, 2026
    Warm Cinnamon Apple Crisp with Golden Oat Streusel

    Why This Recipe Works

    • Apple Variety Blend: Mixing tart Granny Smith with sweet crisp Honeycrisp balances flavor and texture so the filling doesn’t turn to mush.
    • Cornstarch Binding: A touch of cornstarch creates a silky, spiced syrup around the tender baked apples.
    • Cold Butter in Streusel: Cutting cold butter into the oats and flour guarantees distinct, crispy crumb clusters rather than a greasy paste.

    Warm Cinnamon Apple Crisp with Golden Oat Streusel

    Tender spiced Honeycrisp and Granny Smith apples baked under a buttery, brown sugar and rolled oat crumble topping, served warm with vanilla bean ice cream.

    Prep Time
    20 mins
    Cook Time
    45 mins
    Total Time
    65 mins
    Servings
    6
    Scale Ingredients:

    Ingredients (US Customary)

    • 6 medium apples (blend of Granny Smith and Honeycrisp), peeled, cored, and sliced 1/4-inch thick
    • 2 tablespoons pure maple syrup or granulated sugar
    • 1 tablespoon fresh lemon juice
    • 1 tablespoon cornstarch
    • 1.5 teaspoons ground cinnamon
    • 0.25 teaspoon ground nutmeg
    • 1 cup old-fashioned rolled oats
    • 0.5 cup all-purpose flour
    • 0.5 cup packed light brown sugar
    • 6 tablespoons cold unsalted butter, cubed

    Step-by-Step Instructions

    • 1
      Prep Oven & Filling

      Preheat oven to 350°F (175°C). Grease an 8×8-inch or 9-inch round baking dish with butter. In a large bowl, toss apple slices with lemon juice, maple syrup, cornstarch, 1 teaspoon of cinnamon, and nutmeg until well coated. Spread evenly into the baking dish.

    • 2
      Make Streusel Topping

      In a separate bowl, stir together the rolled oats, flour, brown sugar, remaining 1/2 teaspoon cinnamon, and a pinch of salt. Add cold cubed butter. Use a pastry cutter or your fingertips to work the butter in until coarse, pea-sized crumbs form.

    • 3
      Bake to Golden Perfection

      Scatter the oat topping evenly over the apples. Bake for 40 to 45 minutes until the streusel is deep golden-brown and the apple juices are bubbling warmly around the edges.

    • 4
      Cool & Serve

      Let cool for 10 minutes so the juices settle slightly. Spoon into dessert bowls and top with generous scoops of vanilla bean ice cream.

    Kitchen Notes & Chef Tips

    Nut Variation: Add 1/3 cup of chopped pecans or walnuts to the oat topping for extra autumnal crunch.

    Reheating: Crisp in a 350°F oven for 8 minutes rather than microwaving to preserve the crunchy streusel texture.

    380 kcal
    Calories
    4 g
    Protein
    64 g
    Carbs
    14 g
    Fat
  • Slow-Cooker Sunday Beef Pot Roast with Carrots & Potatoes

    Slow-Cooker Sunday Beef Pot Roast with Carrots & Potatoes

    Home / Recipes / Slow-Cooker Sunday Beef Pot Roast with Carrots & Potatoes

    Slow-Cooker Sunday Beef Pot Roast with Carrots & Potatoes

    Melt-in-your-mouth tender chuck roast slow-simmered with savory herbs, red wine, baby potatoes, and sweet carrots in a deeply flavorful beef gravy.

    CP
    CookeryPulse Kitchen Tested & Verified • Oct 13, 2026
    Slow-Cooker Sunday Beef Pot Roast with Carrots & Potatoes

    Why This Recipe Works

    • Hard Skillet Sear: Browning the beef in a screaming hot skillet first creates Maillard flavor that slow-cookers alone cannot produce.
    • Chuck Roast Cut: Rich marbling and collagen melt slowly over 8 hours on LOW, yielding fork-tender succulent beef.
    • Layered Placement: Root vegetables placed at the bottom cook gently in the rich cooking juices without getting mushy.

    Slow-Cooker Sunday Beef Pot Roast with Carrots & Potatoes

    Melt-in-your-mouth tender chuck roast slow-simmered with savory herbs, red wine, baby potatoes, and sweet carrots in a deeply flavorful beef gravy.

    Prep Time
    20 mins
    Cook Time
    480 mins
    Total Time
    500 mins
    Servings
    6
    Scale Ingredients:

    Ingredients (US Customary)

    • 3.5 pounds boneless beef chuck roast, trimmed
    • 2 teaspoons kosher salt and 1 teaspoon black pepper
    • 2 tablespoons olive oil
    • 1 large yellow onion, cut into wedges
    • 5 cloves garlic, smashed
    • 1 pound baby red potatoes or Yukon gold, halved
    • 1 pound whole carrots, peeled and cut into 2-inch chunks
    • 2 cups low-sodium beef stock
    • 0.5 cup dry red wine (Cabernet or Merlot)
    • 2 tablespoons Worcestershire sauce
    • 2 tablespoons tomato paste
    • 3 sprigs fresh thyme and 2 bay leaves

    Step-by-Step Instructions

    • 1
      Season & Sear

      Generously season all sides of the beef chuck roast with salt and pepper. Heat olive oil in a large skillet over high heat. Sear the roast for 4 to 5 minutes per side until a deep dark crust forms. Transfer to a plate.

    • 2
      Deglaze Skillet

      Add onion and garlic to the skillet for 2 minutes. Stir in tomato paste, red wine, Worcestershire sauce, and beef stock, scraping up all browned bits from the pan bottom.

    • 3
      Layer the Slow Cooker

      Arrange the halved potatoes and carrot chunks in the bottom of a 6-quart slow cooker. Place the seared roast directly on top of the vegetables. Pour the warm skillet liquid over everything. Tuck thyme sprigs and bay leaves around the sides.

    • 4
      Slow Cook

      Cover and cook on LOW for 8 to 9 hours (or HIGH for 5 to 6 hours) until the beef pulls apart effortlessly with a fork.

    • 5
      Shred & Serve

      Discard bay leaves and thyme stems. Transfer roast to a cutting board and shred into large chunks. Serve surrounded by tender carrots and potatoes, ladling the rich pan gravy over the top.

    Kitchen Notes & Chef Tips

    Thickening Gravy: Skim fat from the cooking liquid. Whisk 2 tablespoons cornstarch with 3 tablespoons cold water; simmer on the stovetop for 3 minutes for an extra-thick gravy.

    Freezer Meal: Raw chuck roast and aromatics can be frozen together in a vacuum bag for up to 3 months, then thawed and slow-cooked.

    560 kcal
    Calories
    46 g
    Protein
    28 g
    Carbs
    28 g
    Fat
  • Classic American Fluffy Buttermilk Pancakes

    Classic American Fluffy Buttermilk Pancakes

    Home / Recipes / Classic American Fluffy Buttermilk Pancakes

    Classic American Fluffy Buttermilk Pancakes

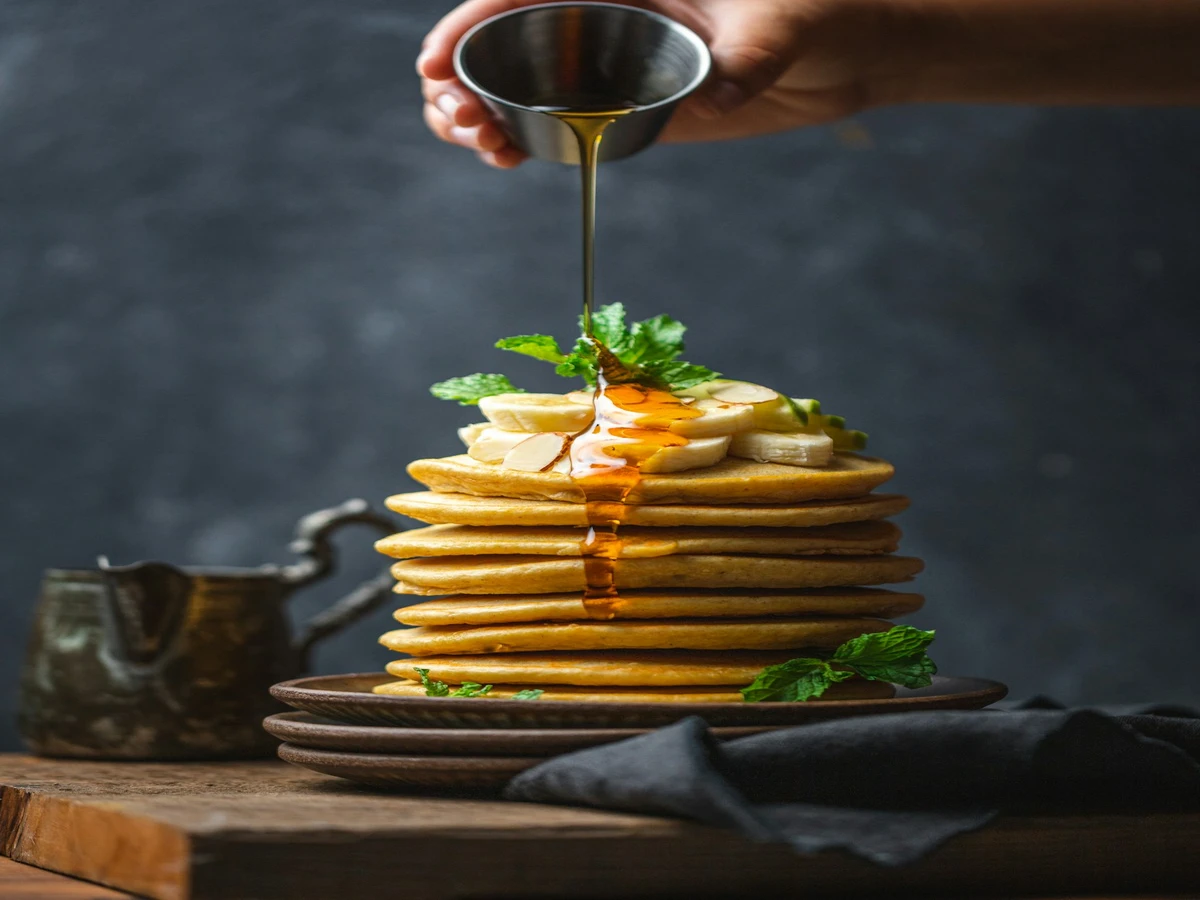
    The quintessential American weekend breakfast: tall, fluffy, golden-brown buttermilk pancakes with tender crumb, best served warm with butter and pure Vermont maple syrup.

    CP
    CookeryPulse Kitchen Tested & Verified • Oct 13, 2026
    Classic American Fluffy Buttermilk Pancakes

    Why This Recipe Works

    • Dual Leaveners: Baking powder provides steady rise while baking soda reacts instantly with the acidic buttermilk for airy bubbles.
    • Lumpy Batter Rule: Gentle folding prevents gluten formation; leaving small flour lumps produces the softest, most tender crumb.
    • 10-Minute Rest: Letting the batter sit allows the starch to hydrate and leaveners to activate before hitting the griddle.

    Classic American Fluffy Buttermilk Pancakes

    The quintessential American weekend breakfast: tall, fluffy, golden-brown buttermilk pancakes with tender crumb, best served warm with butter and pure Vermont maple syrup.

    Prep Time
    10 mins
    Cook Time
    15 mins
    Total Time
    25 mins
    Servings
    4
    Scale Ingredients:

    Ingredients (US Customary)

    • 2 cups all-purpose flour
    • 2 tablespoons granulated sugar
    • 2 teaspoons baking powder
    • 0.5 teaspoon baking soda
    • 0.75 teaspoon fine sea salt
    • 2 cups whole buttermilk, shaken
    • 2 large eggs, lightly beaten
    • 4 tablespoons unsalted butter, melted and slightly cooled
    • 1 teaspoon pure vanilla extract

    Step-by-Step Instructions

    • 1
      Whisk Dry Ingredients

      In a large mixing bowl, whisk together the flour, sugar, baking powder, baking soda, and salt until uniformly blended.

    • 2
      Combine Wet Ingredients

      In a separate medium bowl, whisk together the buttermilk, beaten eggs, melted butter, and vanilla extract.

    • 3
      Fold Gently & Rest

      Pour the wet ingredients into the dry ingredients. Use a silicone spatula to gently fold just until combined. Small flour lumps should remain—do not overmix. Let the batter rest undisturbed for 10 minutes.

    • 4
      Cook on Hot Griddle

      Heat a heavy non-stick skillet or griddle over medium heat (approx. 350°F). Brush lightly with butter. Pour 1/3 cup of batter per pancake. Cook for 2 to 3 minutes until bubbles form on top and pop without filling in, and the edges look set.

    • 5
      Flip & Finish

      Flip gently and cook the second side for another 1 to 2 minutes until golden brown and cooked through. Serve hot with butter and warm maple syrup.

    Kitchen Notes & Chef Tips

    Buttermilk Substitute: Mix 2 cups milk with 2 tablespoons fresh lemon juice or white vinegar; let stand for 5 minutes.

    Add-ins: Scatter fresh blueberries or chocolate chips directly onto the uncooked top of the pancake right after pouring onto the griddle.

    Freezing: Cool pancakes, layer between parchment paper in a freezer bag, and freeze for up to 2 months. Reheat in a toaster!

    310 kcal
    Calories
    9 g
    Protein
    48 g
    Carbs
    9 g
    Fat
  • Air Fryer Crispy Lemon Herb Salmon & Asparagus

    Air Fryer Crispy Lemon Herb Salmon & Asparagus

    Home / Recipes / Air Fryer Crispy Lemon Herb Salmon & Asparagus

    Air Fryer Crispy Lemon Herb Salmon & Asparagus

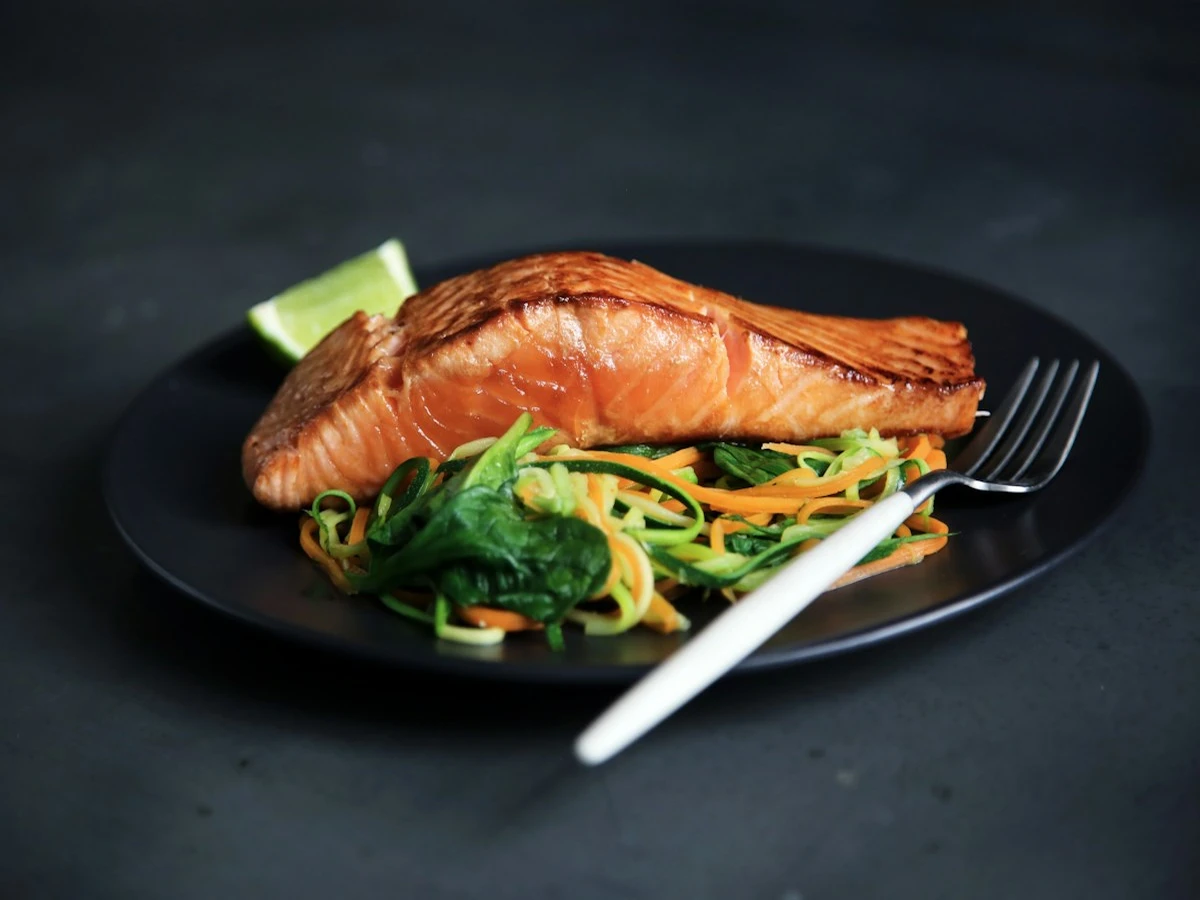
    Moist, flaky center-cut salmon fillets with a savory lemon-herb crust, cooked alongside tender-crisp asparagus in just 10 minutes in the air fryer.

    CP
    CookeryPulse Kitchen Tested & Verified • Oct 13, 2026
    Air Fryer Crispy Lemon Herb Salmon & Asparagus

    Why This Recipe Works

    • Air Convection Power: Circulating superheated air crisps the exterior crust while locking in the natural rich omega-3 oils.
    • Dijon Herb Glaze: A thin brush of Dijon mustard helps garlic, dill, and lemon zest adhere to the salmon flesh.
    • One-Basket Efficiency: Asparagus spears roast in the exact same 10-minute window, minimizing cleanup.

    Air Fryer Crispy Lemon Herb Salmon & Asparagus

    Moist, flaky center-cut salmon fillets with a savory lemon-herb crust, cooked alongside tender-crisp asparagus in just 10 minutes in the air fryer.

    Prep Time
    10 mins
    Cook Time
    10 mins
    Total Time
    20 mins
    Servings
    2
    Scale Ingredients:

    Ingredients (US Customary)

    • 2 salmon fillets (6 oz each, skin-on or skinless)
    • 1 bunch fresh asparagus, woody ends trimmed
    • 1.5 tablespoons extra virgin olive oil
    • 1 teaspoon Dijon mustard
    • 2 cloves garlic, minced
    • 1 tablespoon fresh dill, finely chopped
    • 1 teaspoon lemon zest plus fresh lemon wedges for serving
    • 0.75 teaspoon kosher salt and freshly ground black pepper

    Step-by-Step Instructions

    • 1
      Preheat the Air Fryer

      Preheat your air fryer to 400°F (200°C) for 3 minutes. Lightly coat the air fryer basket with olive oil spray.

    • 2
      Season the Salmon & Veggies

      Pat salmon dry with paper towels. In a small dish, mix 1 tablespoon olive oil, Dijon mustard, minced garlic, lemon zest, chopped dill, salt, and pepper. Brush generously over the salmon fillets. Toss trimmed asparagus in the remaining 1/2 tablespoon olive oil with a pinch of salt.

    • 3
      Air Fry to Perfection

      Place salmon in the center of the air fryer basket (skin-side down if applicable) and arrange asparagus around the sides in a single layer. Air fry at 400°F for 8 to 10 minutes, until the salmon flakes easily with a fork and reaches 145°F internal temperature.

    • 4
      Garnish & Enjoy

      Squeeze fresh lemon juice over the salmon and asparagus. Serve immediately with lemon wedges and a sprinkle of fresh dill.

    Kitchen Notes & Chef Tips

    Thickness Check: 1-inch thick fillets need about 9-10 minutes. Thinner tail fillets cook in 7-8 minutes.

    Skin-On Advantage: Skin protects the delicate fish from drying out against the hot air fryer grate.

    Meal Prep: Flake leftover salmon over crisp garden greens for a high-protein lunch the next day.

    390 kcal
    Calories
    36 g
    Protein
    6 g
    Carbs
    24 g
    Fat
  • Creamy Tuscan Garlic Butter Pasta with Spinach

    Creamy Tuscan Garlic Butter Pasta with Spinach

    Home / Recipes / Creamy Tuscan Garlic Butter Pasta with Spinach

    Creamy Tuscan Garlic Butter Pasta with Spinach

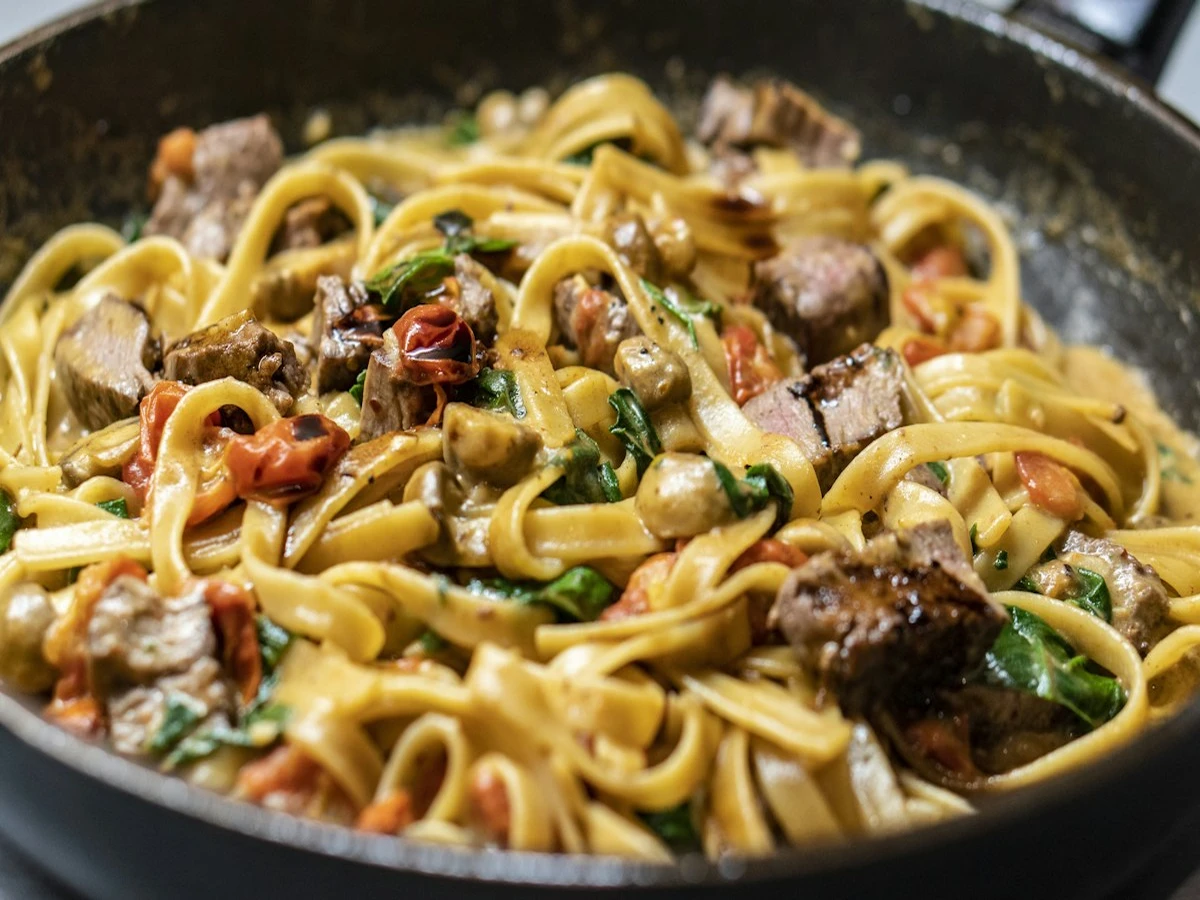
    A 30-minute weeknight pasta sensation featuring penne tossed in a velvety garlic-parmesan cream sauce, sweet sun-dried tomatoes, and fresh tender baby spinach.

    CP
    CookeryPulse Kitchen Tested & Verified • Oct 13, 2026
    Creamy Tuscan Garlic Butter Pasta with Spinach

    Why This Recipe Works

    • Reserved Pasta Water: The starchy cooking water emulsifies the cream and parmesan into a glossy, clingy sauce.
    • Sun-Dried Tomato Oil: Sautéing garlic in the oil from the sun-dried tomato jar injects concentrated savory flavor right into the base.
    • Freshly Grated Parmesan: Pre-shredded cheese contains anti-caking agents; grating a block fresh guarantees a silky-smooth melt.

    Creamy Tuscan Garlic Butter Pasta with Spinach

    A 30-minute weeknight pasta sensation featuring penne tossed in a velvety garlic-parmesan cream sauce, sweet sun-dried tomatoes, and fresh tender baby spinach.

    Prep Time
    10 mins
    Cook Time
    20 mins
    Total Time
    30 mins
    Servings
    4
    Scale Ingredients:

    Ingredients (US Customary)

    • 12 ounces penne or rigatoni pasta
    • 2 tablespoons oil from sun-dried tomato jar (or olive oil)
    • 2 tablespoons unsalted butter
    • 5 cloves fresh garlic, finely minced
    • 0.75 cup sun-dried tomatoes in oil, drained and julienned
    • 1 cup heavy cream (or half-and-half)
    • 0.5 cup low-sodium chicken broth or vegetable broth
    • 1 cup freshly grated Parmigiano-Reggiano cheese
    • 3 cups packed fresh baby spinach leaves
    • 0.5 teaspoon red pepper flakes (optional, for subtle warmth)
    • 0.5 cup reserved starchy pasta cooking water

    Step-by-Step Instructions

    • 1
      Boil the Pasta

      Bring a large pot of generously salted water to a rolling boil. Add penne and cook according to package directions until 1 minute shy of al dente. Carefully scoop out 1/2 cup of starchy pasta water, then drain pasta.

    • 2
      Sauté Aromatics

      While the pasta cooks, melt the butter with the sun-dried tomato oil in a large deep skillet over medium heat. Add minced garlic and red pepper flakes; cook for 60 seconds until fragrant and aromatic.

    • 3
      Build the Cream Sauce

      Add sun-dried tomatoes, heavy cream, and chicken broth. Bring to a gentle simmer for 3 to 4 minutes until slightly thickened. Reduce heat to low.

    • 4
      Melt Cheese & Wilt Greens

      Whisk in the grated parmesan cheese until melted and smooth. Stir in the fresh baby spinach, cooking for 1 to 2 minutes until just wilted into the cream sauce.

    • 5
      Toss and Gloss

      Add the cooked pasta directly into the skillet. Toss thoroughly for 1 minute so the sauce coats every noodle, drizzling in 2 to 4 tablespoons of reserved pasta water as needed to achieve a luxurious, glossy consistency. Serve immediately with extra parmesan.

    Kitchen Notes & Chef Tips

    Add Protein: Pan-seared chicken breast strips or grilled shrimp pair naturally with this sauce.

    Wine Option: Deglaze the pan with 1/4 cup of dry white wine (like Pinot Grigio) before adding the cream for extra depth.

    Reheating: Warm gently on the stovetop over low heat with a splash of milk or broth to loosen the sauce.

    510 kcal
    Calories
    16 g
    Protein
    62 g
    Carbs
    24 g
    Fat
  • Crispy Garlic Butter Skillet Chicken Thighs

    Crispy Garlic Butter Skillet Chicken Thighs

    Home / Recipes / Crispy Garlic Butter Skillet Chicken Thighs

    Crispy Garlic Butter Skillet Chicken Thighs

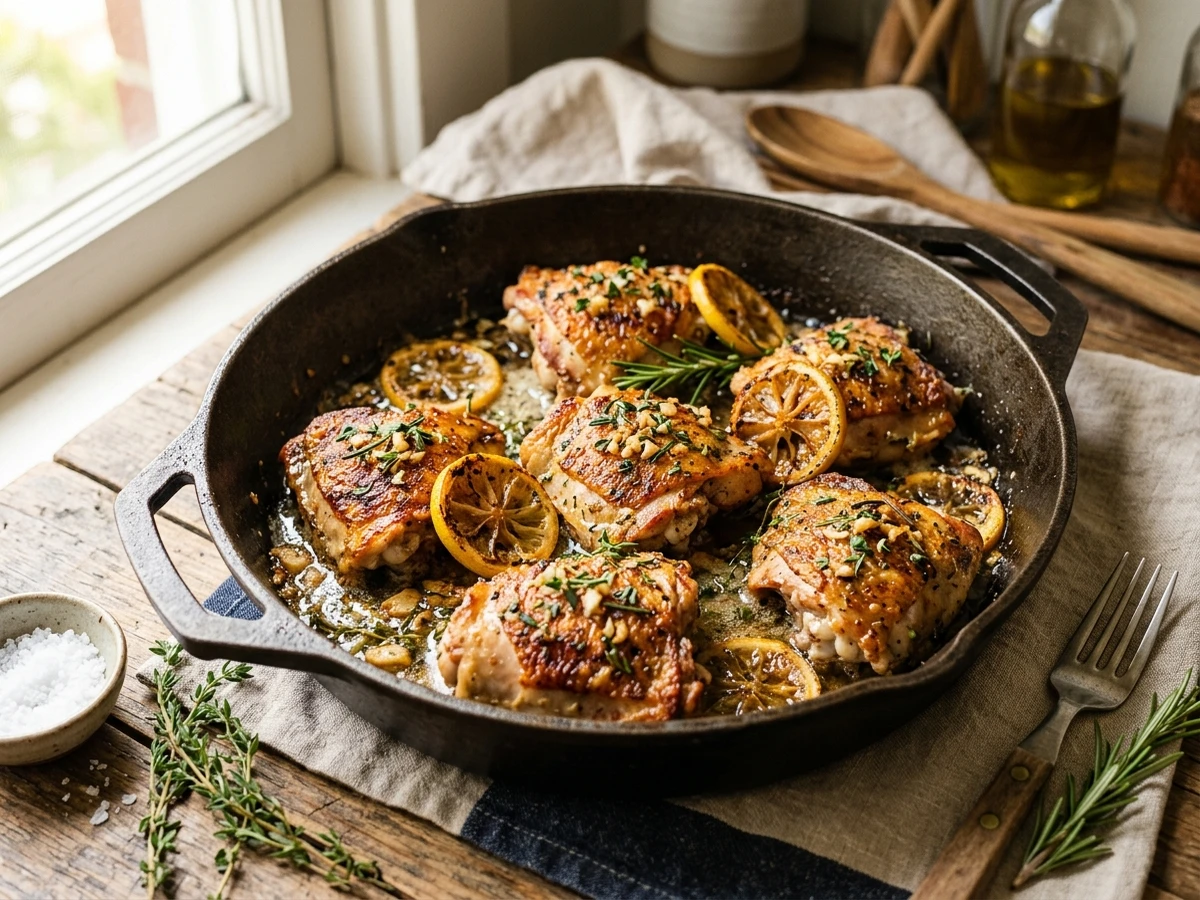
    Tender, juicy bone-in chicken thighs seared in a cast-iron skillet until deeply golden and shatteringly crisp, then basted in aromatic garlic-herb butter and finished with fresh lemon zest.

    CP
    CookeryPulse Kitchen Tested & Verified • Oct 13, 2026
    Crispy Garlic Butter Skillet Chicken Thighs

    Why This Recipe Works

    • Bone-In, Skin-On Cut: Retains maximum natural moisture while providing a barrier for rendered, super-crispy skin.
    • Dry Surface Sear: Patting thighs thoroughly with paper towels prevents steam and ensures a restaurant-grade golden crust.
    • Butter Basting Finish: Adding butter and garlic at the end avoids burnt milk solids while infusing rich, nutty aromatics.

    Crispy Garlic Butter Skillet Chicken Thighs

    Tender, juicy bone-in chicken thighs seared in a cast-iron skillet until deeply golden and shatteringly crisp, then basted in aromatic garlic-herb butter and finished with fresh lemon zest.

    Prep Time
    15 mins
    Cook Time
    25 mins
    Total Time
    40 mins
    Servings
    4
    Scale Ingredients:

    Ingredients (US Customary)

    • 6 bone-in, skin-on chicken thighs (about 2.5 lbs total)
    • 1.5 teaspoons kosher salt
    • 0.75 teaspoon freshly cracked black pepper
    • 1 teaspoon garlic powder
    • 1 teaspoon smoked paprika
    • 1 tablespoon olive oil
    • 3 tablespoons unsalted butter
    • 5 cloves garlic, minced
    • 4 sprigs fresh thyme
    • 2 sprigs fresh rosemary
    • 1 lemon, sliced into rounds for basting and serving

    Step-by-Step Instructions

    • 1
      Prep & Season the Chicken

      Thoroughly pat the chicken thighs completely dry with paper towels on all sides. In a small bowl, whisk together kosher salt, black pepper, garlic powder, and smoked paprika. Rub the seasoning evenly over both sides of the chicken, working some underneath the skin.

    • 2
      Sear Skin-Side Down

      Heat 1 tablespoon of olive oil in a 12-inch heavy cast-iron skillet over medium-high heat until shimmering. Place the chicken thighs skin-side down into the skillet (they should sizzle vigorously). Cook undisturbed for 12 to 14 minutes, maintaining medium heat, until the skin is a deep golden brown and releases easily from the pan.

    • 3
      Flip & Reduce Heat

      Flip the chicken thighs over to meat-side down. Reduce heat to medium-low. Cook for another 8 to 10 minutes until an instant-read meat thermometer inserted into the thickest part (without touching the bone) registers 165°F to 170°F.

    • 4
      Garlic Butter Baste

      Drop the unsalted butter, minced garlic, fresh thyme, rosemary sprigs, and lemon slices into the skillet. As the butter melts and foams, tilt the skillet slightly and use a large spoon to baste the hot herb butter continuously over the chicken thighs for 2 minutes.

    • 5
      Rest & Serve

      Transfer the chicken to a warm platter. Spoon the pan juices and caramelized garlic over the top. Let rest for 5 minutes before serving alongside roasted potatoes or green vegetables.

    Kitchen Notes & Chef Tips

    Pan Choice: Cast iron or heavy stainless steel provides the best heat retention for deep browning.

    Make-Ahead: Season the chicken up to 24 hours in advance and keep uncovered in the refrigerator (dry-brining makes the skin even crispier).

    Storage: Store leftovers in an airtight container in the refrigerator for up to 4 days. Reheat in a 375°F oven or air fryer for 6-8 minutes to restore crispiness.

    420 kcal
    Calories
    38 g
    Protein
    4 g
    Carbs
    28 g
    Fat